Into the Heart; A Guided Spiritual Journey toward Becoming A Better Man–Project 1
I’m excited to get started—Here are a couple of options for our first Project of the Month! Option 1 is a suitcase side table. Option 2 is a shadowbox that you can hang on the wall or place on a table.
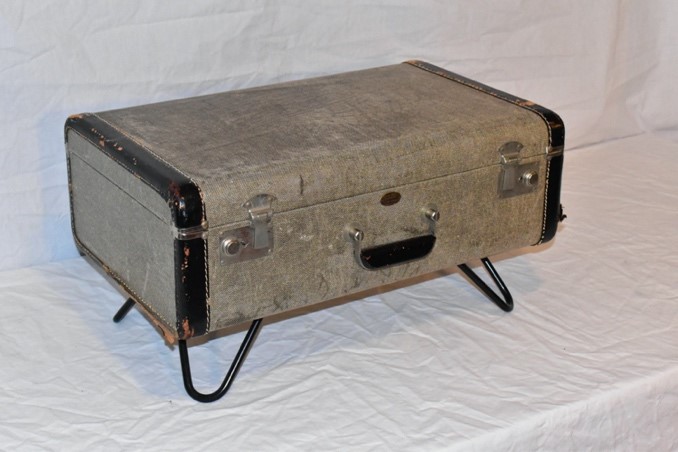
The suitcase side table is fun and easy to make. If you don’t have one of these old beauties buried in your closet or garage, then enjoy the hunt. I loved looking for mine—I bumped into it at a flea market in Torrance, California. 15 bucks! Once you have the suitcase, all you need is a standard 1 X 12 pine board from Lowe’s or Home Depot and the hairpin legs. I ordered the legs from diyhairpinlegs.com. The legs come in many sizes and include the screws you need to attach them to your suitcase. To assemble, just cut down your 1 X 12 to fit inside the case, then attach the legs to the bottom. Done! When I put mine together, the screws popped through the pine board into the case, so I just plopped some magazines in there. I think it’s great.
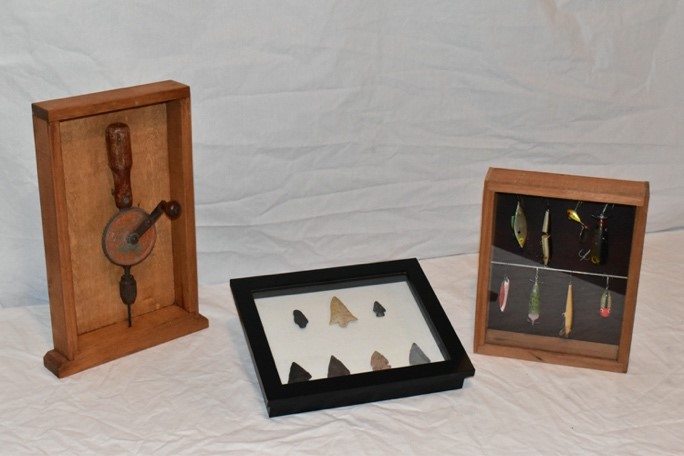
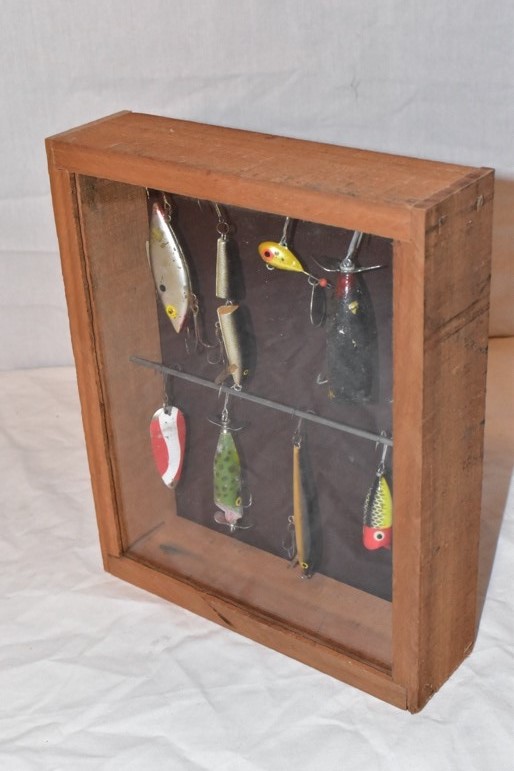
The shadowbox is more time consuming, but definitely worth the effort. Part of the fun is picking out or hunting for the items you want to display. Then, it’s time to build! Of course, you can order the shadowbox online if you like. I ordered the box I used to display my arrowheads on Amazon, and I really like the way it turned out. If you want to build an open-face box like the one I made for my hand drill, I think you can gather all the information you need from the photo. The fishing lure shadowbox, on the other hand, might require a little more explanation.
For this box, I started with an old pallet (another item to hunt for!). I sized the box to hold a standard 8 X 10 piece of framing glass, which I picked up at Michael’s, then cut the grooves to accommodate the glass on my router table. I rabbeted the corners on my radial arm saw, then went back to the router table to rabbet the back edge of the box as well. Used a small-diameter piece of steel rod from Lowe’s to hang the lures in the middle, and screw eyes for the ones near the top. But, don’t let my tools and terms discourage you! You can build a very attractive box in a number of ways using basic tools. For example, you can use butt joints for the corners and insert narrow strips of wood to hold the glass. You can also tack the back directly onto the frame (I used ¼ inch plywood), although I encourage you to cut the back a little smaller than the frame so you don’t notice it when looking at the finished product.
As you press forward with your project, just bring these three reminders with you:
- Have fun figuring out what to make and how to make it.
- Enjoy the hunt for everything you will need.
- Tell perfectionism to take a hike—perfect is boring.
- Take time to admire the result!